Living with art
A Clear Place for Blue, Yellow and a Strong Portrait Gaze
Plan Blue and Yellow Textures through shared views, a restrained accent palette and readable light, keeping its face and drip-like movement clear without making the whole room equally intense.
Where do you want the strong gaze to meet the room?
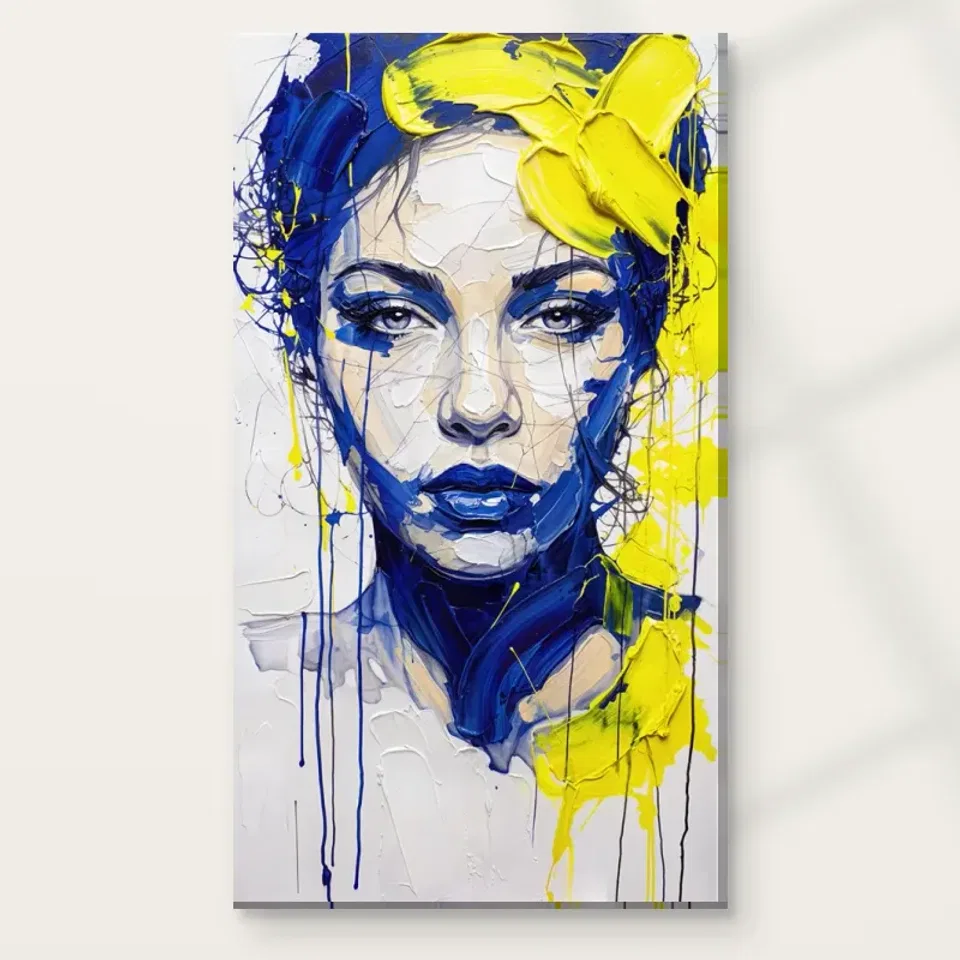
Blue and Yellow Textures is a vivid portrait, not simply a blue-and-yellow colour field. Begin with the encounter you want. A wall opposite a reading chair can offer sustained looking, while a home-office side wall can provide a chosen view away from work. An entrance position may make the face a strong greeting. None is automatically best. Walk through the room and sit in the usual places, imagining the complete image. The gaze may become more significant over time, so its presence should be welcome in the proposed position rather than overlooked while choosing colours.
In a shared room, consider every main seat. One person may face the portrait directly for long periods while another sees it briefly. The household does not need to agree about the woman's expression, but it should be comfortable with the image's prominence. A side wall can preserve a clear view without making it unavoidable from every activity. A principal wall can work if the aim is a concentrated figurative focus. Discuss actual sightlines rather than insisting that everyone respond to the gaze in the same way. Practical placement can accommodate different readings while keeping the room easy to use.
Should you repeat blue, yellow or neither?
The artwork offers two obvious accent routes, but repeating both across the room can make every object compete with the face. Start with what you own. A blue textile, warm timber or one modest yellow-related object may provide enough connection. The echo does not need to match a screen sample exactly. The image contains variation and several tonal relationships, not two flat swatches. A quieter supporting note can be more effective than a complete coordinated set. If the room is neutral, the print can remain the main colour event without any literal repetition at all.
Check the whole view before adding anything. A large blue sofa contributes differently from several small blue ornaments, and a yellow object under a lamp may become more prominent at night. The goal is a hierarchy in which the portrait remains the concentrated event. If a nearby accent repeatedly pulls your eye away from the face, move it temporarily and observe the change. This is a reversible experiment, not a rule against colour. Position, scale and a clear wall can establish the artwork's place as strongly as matching accessories, leaving the room more flexible when furnishings change later.
Give the drip-like movement a quieter local setting
The image already contains directional marks and a sense of downward flow. Nearby wallpaper, patterned curtains or several similarly active pictures may compete at the same visual scale. Give it one steadier neighbour: a plain wall section, an evenly toned sofa or a broad cabinet front. Calm need not mean white or empty. A deep even colour may be visually quieter than a pale sharp pattern. Judge from the intended viewing distance, where fine detail merges and broad relationships dominate. The immediate area should help the complete portrait read clearly rather than becoming a second field of equally restless movement.
A layered home can still accommodate the work. The useful distinction is between the main event along a sightline and supporting detail. Keep personal objects where they matter, but do not require all of them to sit directly below the print. A tall lamp or plant can obscure a lower passage from a chair even if there is a physical gap. Include normal belongings in the trial. A plan that only works above a temporarily empty surface may be too fragile for daily use. Moving one item can reveal the face and surrounding flow more effectively than adding decoration or choosing a larger size.
A home-office wall can offer a deliberate change of attention
The product's related rooms include the home office. Consider a side wall visible when turning away from a screen, rather than a position hidden behind equipment. The portrait can offer a different kind of looking from clear task information, but it should not be expected to improve productivity or concentration. Its practical value can simply be that you enjoy the encounter. Test the view while the desk is in normal use, with cables, lamps and papers present. The room does not have to hide its function. The artwork needs enough separation that the face is not visually split by equipment or crowded by several competing images.
If the office doubles as a guest room or shared space, test those uses too. A moved chair, opened bed or cupboard can alter clearance and sightlines. Choose a position that survives ordinary changes rather than one that requires furniture to remain fixed in an inconvenient arrangement. The same applies to a living room: a wall that is useful during reading or conversation may be better than a dramatic placement competing directly with the television. The portrait's strong gaze can remain an intentional destination, not a constant demand that follows every activity. That leaves both the image and the room's users a little choice.
Keep human presence separate from colour coordination
A blue-and-yellow palette may fit a room easily while the face feels more direct than expected. Evaluate those questions separately before bringing them together. Ask whether you want a recognisable person-like presence at that location, then ask how the colours relate to the furnishings. A nonfigurative work in the same range would offer a different experience. This distinction helps avoid choosing an intense portrait as though it were merely a textile sample. The gaze and expressive treatment will remain after accessories change, so they should be part of what makes the placement appealing.
Shared reactions can be discussed without settling the woman's emotion or identity. The verified information does not name a real person, and the room does not need a caption inventing one. One viewer may notice the gaze first while another follows the marks. Both can enjoy the image if the arrangement provides a comfortable view. If someone finds a central position too insistent, compare a side wall before abandoning the work or requiring them to reinterpret it. Concrete choices about prominence, distance and surrounding clarity are more useful than an argument about a supposedly correct psychological reading.
Measure the full portrait and leave practical clearance
Mark an available size on the wall with a suitable removable method, then check it from seated and standing positions. Plan the complete rectangle, including the drip-like field, not only the face. Would furniture, a lamp or a plant hide part of it? Does the outline feel squeezed by a door frame, switch or shelf? A larger size does not automatically correct an awkward angle. The useful dimensions support a comfortable complete view at the distance you will use, while allowing the room to function naturally. A vivid gaze can have strong presence without occupying the largest possible area.
Use the current configurator's presentation figures. Rolled canvas distinguishes selected artwork area, printed allowance and supplied flat dimensions. Stretched canvas states the front face with wrap separately. A framed paper print has additional outer dimensions that should be planned with the framer. Do not rely on an old margin or apparent size in a visualisation. Existing room scenes are illustrative, not measured installations or proof of included objects. Translate a useful relationship from them into your own wall and furniture plan. Check door swings, chair movement and normal routes as well, so the print does not become a reason to restrict ordinary use.
Check Blue and Yellow Textures' current dimensions and formats
Look at the wall while the room is occupied
An empty room can make almost any placement appear clearer than it will be in practice. Sit in the chairs, open the cupboard and move the desk or lounge furniture as you normally do. A person below the print may change the entrance view, and a chair pulled closer may make the portrait feel more immediate. Every angle need not be perfect, but the main intended encounter should work when people are present. This practical trial is particularly useful for a face with a strong gaze, because distance and angle can change how directly it seems to address the viewer.
If the placement fails during ordinary use, try a modest change before buying more decor. A different wall, a little more clearance or a moved lamp may solve the issue. The aim is not a display that succeeds only for a photograph. It is a place where the whole blue-and-yellow composition remains available while the room accommodates conversation, work and rest. The image's active surface belongs on the wall; real people should not have to preserve a decorative ideal by avoiding useful furniture or changing their normal route around the space.
Use light to reveal contrast rather than exaggerate it
Begin with ordinary room lighting and check whether blues, yellows, face and drip-like marks remain readable together. A harsh beam can overemphasise one bright passage, while weak uneven light can reduce the image to disconnected notes. View from the actual seats and approach route. Moving an existing lamp may help more than adding a spotlight. If choosing framed paper, consider reflections from windows and lamps. The goal is a comfortable view of the complete portrait, not a theatrical display that adds another layer of intensity to an already forceful image.
Avoid unnecessary direct sunlight, persistent damp and strong heat as general display considerations. Think about seasonal light and normal heating use where possible. The Canadian Conservation Institute's basic painting-care guidance offers useful further reading, but it does not certify this print or guarantee longevity. Follow instructions for the actual support and presentation, and discuss unusual conditions with a competent framer or supplier. Optional finishing should not be expected to make the object waterproof or solve an unsuitable wall. Sensible conditions allow the image to remain visually active while the practical care plan stays straightforward and proportionate.
Choose support and finish through the actual order
Neptune Natural Matt Canvas 400 is specified as a 100 percent cotton, 400 gsm support with a natural warm base and irregular weave. Compatible photographic poster papers include Oyster 271 and Photo Lustre 310. Choose a format alongside your presentation plan rather than assuming one is universally best for vivid portraits. Plan a suitable presentation step for a rolled paper or canvas version of this blue-and-yellow face; the stretched-canvas choice is supplied ready to hang. Optional light, selective hand-finishing is distinct from an ordinary print. It does not turn every depicted layer into raised paint or make the object an original impasto painting.
Arrange framing where required and plan fixings suited to the actual wall and supplied piece. Keep a safe unpacking area instead of leaving the print in a busy passage while deciding what to do. Quality in daily use includes accurate specification and appropriate handling, not simply the most elaborate finish. Confirm material, size, presentation and selected finish before ordering. That clarity allows the face and colour field to remain open in interpretation. You can appreciate a painted-looking surface without expecting physical properties or provenance that the product has not offered, and let the support serve the way you genuinely want to display the image.
Let the room remain less intense than the portrait
Consider a hypothetical room that already has a large blue textile and warm wooden furniture. The first trial need not add yellow cushions. Place the outline on a clear wall, keep the existing objects and assess whether the warm timber already supports the portrait's brighter notes. In another hypothetical room with mostly pale surfaces, the image may work as the only strong colour area. These are planning examples, not descriptions of the supplied gallery. Judge both by the same practical standard: a full view, suitable clearance and a comfortable encounter with the face. If the arrangement feels unsettled, move one nearby object or test another wall before buying a new colour set. A strong portrait can belong through proportion and sightline without needing every hue repeated elsewhere, which leaves the room more personal and easier to change as ordinary life continues around it.
The completed setting does not need every object to repeat blue and yellow or every surface to carry movement. Establish a clear place, one or two restrained links and a comfortable sustained view. Then use the room before adding more. If the wall feels crowded, remove one nearby pattern or object. If it feels disconnected, test an existing tonal connection. A practical home can contain a strong portrait while furniture and personal belongings provide steadiness. The artwork may be the active element in its immediate area without dictating the entire room's mood or identity.
Recheck shared views and the selected presentation dimensions, then leave tolerance for later changes. A new textile or moved chair should not make the whole arrangement fail. Stable relationships of scale, sightline and light are more durable than a complete matched set. Blue and Yellow Textures can remain a vivid face in an ordinary living or working space without a named sitter or a promised emotional result. A comfortable encounter with the complete image and an accurately chosen format provide the useful foundation, leaving its gaze, contrasting colour and drip-like movement open to your own changing attention.
Continue with this artwork
Find your next artwork
Four checks for placing Blue and Yellow Textures
Read more: Four checks for placing Blue and Yellow TexturesRead less: Four checks for placing Blue and Yellow Textures
Blue and yellow portrait placement starts with the eyes, not with matching the furniture. In this artwork, the yellow takes up several broad areas, yet the gaze stays near the centre. The best spot for you is the one where both features can read in your usual view.
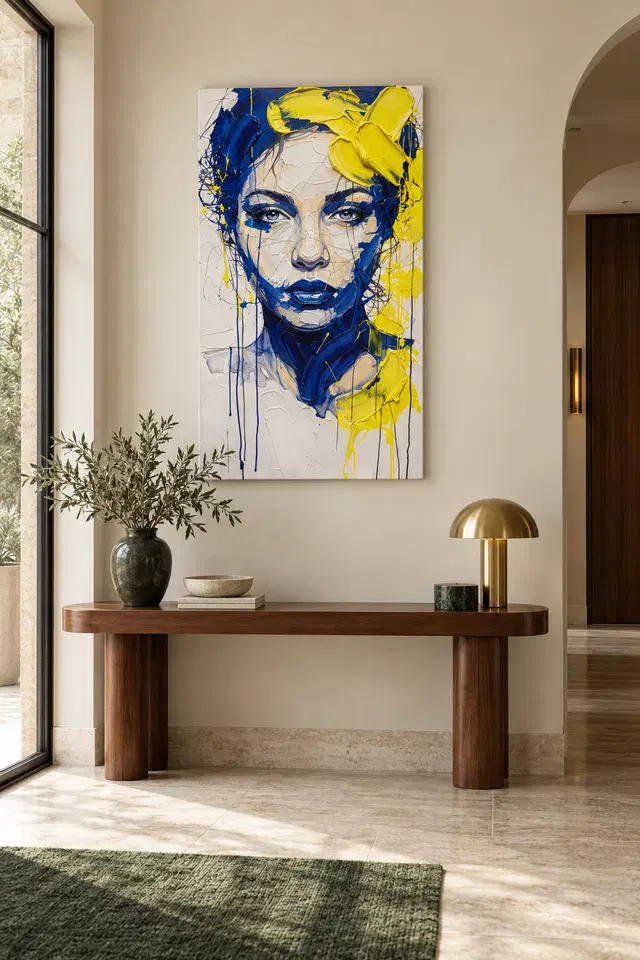
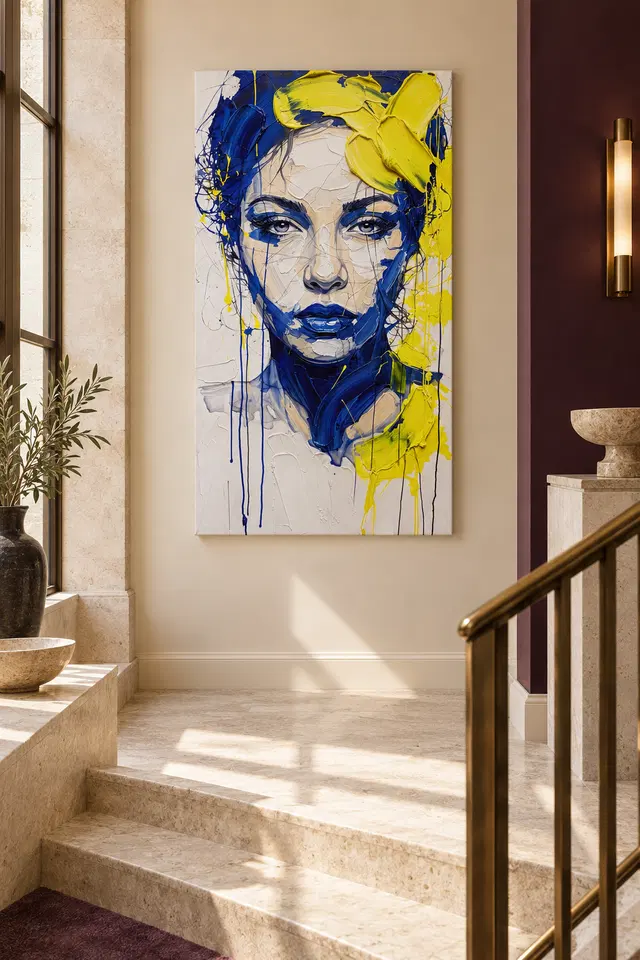
The console and landing scenes above offer different surroundings for the same print. They do not supply wall or order measurements. Try four checks in your own room: the background, the approach, the light and the complete outline. You can compare positions without changing furniture or hanging anything during the test.
Blue and yellow portrait placement check one: give the edge its own space
Stand where you would usually see the proposed wall. Mark a temporary outline using a method suitable for that surface. On a pale wall, the lighter side of the image may seem less distinct than the blue region. However, you do not need both edges to stand out in the same way.
Try the same outline a little farther from a dark door or large piece of furniture. A vertical edge close to the pale side can make you notice one boundary before another. Therefore, see whether the portrait reads as a clear rectangle without competing with that edge. Neither test requires a new frame.
The console scene gives the piece a horizontal shape below. In your room, a console may matter more for keys or a lamp than for arranging art. Keep those items in place first. Then temporarily move only the largest shape if it seems to block part of the view.
Look at the gap between the proposed lower edge and the objects below it. A tall vessel may not cover the outline, but it could make the fine marks harder to notice. Therefore, compare the same spot without moving your furniture. A small position change may give those marks more room without asking you to keep the console bare.
Let blue and yellow portrait placement work with your existing colours
The National Gallery's glossary on composition explains arrangements within a work. In this case, apply that distinction to separate the eye and blue forms in the picture from any blue chair or wall nearby. The room can keep its own colours without turning them into a single composition with the artwork.
Before you buy wall art, compare a wall against a calmer neighbour and a more active one. For instance, a busy rug near the landing may pull attention low, while a tall cabinet matters more at the edge. Test the furniture and the outline together from an actual viewpoint. Decide whether the gaze still comes into view on its own.
Blue and yellow portrait placement check two: watch from the ordinary approach
First look from the doorway. Then compare the view you use from a seat across the room or from an adjoining area. The face can enter your view before the lower edge. If you mainly notice the yellow, shift the outline sideways to test whether a different angle gives the central features more space.
The companion study of the gaze and falling lines can help choose two landmarks. For example, start with the eyes and a pale space next to the thin blue marks. Then see which landmark still matters from farther away. You do not need a view that shows all the marks at once.
In the landing scene, the portrait sits above a short flight of steps and beside a railing. That tells you about the pictured arrangement, not how to fit a print. If you are considering such a place, compare views from a stable spot. Moreover, make sure everyday movement does not require a stop in a narrow area.
If you prefer a position seen from another room, try leaving the door at its normal angle. As you walk through, notice whether the yellow appears before the face. You may like that gradual view even if it reveals less at once. Then compare with a spot that shows the full outline immediately.
Set a second viewpoint for blue and yellow portrait placement
Try a view towards a desk or another quiet route. If there is a screen or shelf nearby, check whether the tall picture remains visible when you sit. The home-office wall art selection lets you compare a less direct gaze or a different shape in the same spot. Keep your position constant so that the wall remains part of the comparison.
For a wall you see often, repeat the test with the door open as it usually stands. A clear view while a room is temporarily tidy or shut does not tell you how it works later. In particular, look for any part of the face you lose from that position. Then check whether that matters more than what you see when passing.
Blue and yellow portrait placement check three: see which light you use
Compare the proposed wall by day and with your normal lamps. You can see the brighter yellow clearly under one light while losing some pale detail near the face. In contrast, a bright spot moving as you shift your view might be a reflection. Test those possibilities separately rather than changing all the lighting at once.
The Canadian Conservation Institute's guide to light exposure offers useful context for the effect of illumination over time. A day-lit visualisation does not establish suitable exposure for the supplied work. Check the actual material and room conditions. Use the scene to consider a view, not how long the colours will hold.
The studio comparison of canvas and paper surfaces helps check whether surface or glazing could change the display. A pale mark in the picture can look bright without telling you how the finished item reflects a lamp. Therefore, check that separately before you buy artwork for a place facing a window.
Compare a second lamp position for blue and yellow portrait placement
Use another light you already have, if practical, rather than purchasing one just for the test. Look where a shadow falls across the proposed outline. If the lamp also has an everyday job, keep it where you can use it. A different position for the portrait may solve more than a new lighting plan would.
Blue and yellow portrait placement check four: verify the dimensions you will use
Check the current Blue and Yellow Textures listing for the actual size and presentation. If hand made wall art was your starting search, distinguish the print, finish and any separate display choices. The look of the broad yellow marks alone does not identify how the supplied piece was made.
Read the guide to the total cost of ready-to-hang wall art if your plan includes fittings or a frame. Start with the complete outside size, not the image area alone. Then return to the wall and look at the gap around the intended outline. Check any dimension that may change with the selected format.
Compare two positions using the same proposed size before trying another size. If one lets the pale edge stay clearer and another gives the eyes a better view, decide which priority matters more. This can also show why a bigger image does not always improve the usual view. It might leave less useful space between the print and what surrounds it.
Now see whether any space used for another purpose would be reduced. For instance, if a nearby door usually opens towards the wall, test the outline with the door fully open. The pictured room is not evidence about that clearance. Keeping practical and visual comparisons separate makes the final decision easier.
Frequently asked questions
Where should blue and yellow portrait placement begin?
Choose a spot you often see in the room. Mark the full outline and look for the eyes or the upper yellow region. Then compare another angle. That is more reliable than guessing from the proportions of the furniture in an illustration.
Must I use a white wall?
No. Try the edge against your wall and see whether the pale area and blue still read separately. A darker wall may help the lighter areas stand out. However, it could also make a dark edge quieter, depending on the direction of the light.
Is blue and yellow portrait placement a reason to add matching cushions?
No. The portrait already carries the colours strongly. Look at it next to the furniture you have before adding anything. For example, a plain colour nearby may make the eyes easier to see than another object that repeats the brightest yellow.
What can the console visualisation tell me?
It shows how an upright picture can sit visually above a wider surface. It does not provide dimensions, clearances or installation instructions. Instead, use it to decide what you might measure. Then use actual sizes and normally placed furniture for the test.
How does blue and yellow portrait placement work near stairs?
Check the view from a safe part of the room rather than a particular step. Think about the walk past as well as a longer look. Then confirm the actual dimensions and safe installation requirements. Do not copy an angle in the illustration.
Will the eyes always be the first feature I see?
No. From one direction the large yellow area can draw attention first. From a seated position you may notice the eyes sooner. Compare those approaches while keeping the outline fixed. Therefore, you can decide which first impression works better in that room.
Should a frame match the darkest blue?
Not necessarily. If you plan a frame, compare both its look and its outside dimensions. A dark edge can change the relationship with a quiet wall. Nevertheless, do not assume a frame is part of an option unless the listing says so.
Can a small reflection affect the pose?
It might obscure one of the eyes or a line you use to read the face. Move your viewpoint to see whether the spot moves as well. Then check whether an adjustment to the light or another wall gives you a cleaner view.
Is the pictured texture a reason to put the print in strong light?
No. Texture in the image isn't a specification for the actual surface. If you enjoy the appearance of the marks, compare the finish you select with the light you normally have. Also, consider exposure separately from the brightness of an attractive preview.
Can the print work across from a desk?
Possibly. Check whether the screen, a lamp or a shelf hides the face from a seated position. If the gaze becomes too strong for your usual work view, try the wall beside you. The display can still work from the doorway.
What should I check before comparing sizes?
Measure the usable wall space first, then note how far away you usually look. If another part of the final setup changes the outside dimensions, include it. That gives both options the same practical test instead of guessing from different illustrative rooms.
What if the gaze draws too much attention?
Try a position away from the direct line of a seat, or compare an image with a quieter centre. However, see what happens from a second place before deciding. You may enjoy the direct view during a brief pass but prefer another view for a longer stay.
Finish blue and yellow portrait placement with the view you want to keep
Return to the outline that gives the pale edges, bigger colour and direct gaze enough room. Judge it beside the objects and light you actually use. If it works in those ordinary conditions, you have a clearer reason to choose the picture than the look of either staged room.
Check the selected dimensions and finish before ordering. Then choose the option that fits your measured position. Let the portrait keep its own colour and direction without making the whole room match it.